Introduction:
Here I am
going to explain how to integrate Kendo to MVC5. I have developed this project
by taking reference by this link
Before
integration, let’s be ready with Kendo UI stuff.
Check in
your machine, whether “ui-for-asp.net-mvc” installed or not.
See the
below screen shot
If it is
not there, then follow the below steps to install it.
Step 1:
If you
don’t have account, you can create for trail account.
Step 2:
Paste the
below link in browser once you have logged in
https://www.telerik.com/download-trial-file/v2/ui-for-asp.net-mvc it will ask download location for
software.
It looks
like below


Once after
completion of the software, install it.
Now we are
ready with all the files required for integration of Kendo with MVC.
Follow the
steps below
Step 1:
Open visual
studio, select web from left menu, select first project type “ASP.NET Web
Application (.NET Framework)” (in below screen,highlighted one in blue color).
Give some name for solution (KendoMVCIntegration), Click on “OK” button.
Step 2:
After
clicking “OK” button it will show up the below screen. Select MVC template,
click on “OK” button.
Step 3:
It will
take little time and will create the MVC project
Open
solution explorer and check the directory structure as below.
Step 4:
Now right
click on solution, click on “Open Folder in File Explorer”, see the below
screen
Step 5:
Will see
the below screen
Step 6:
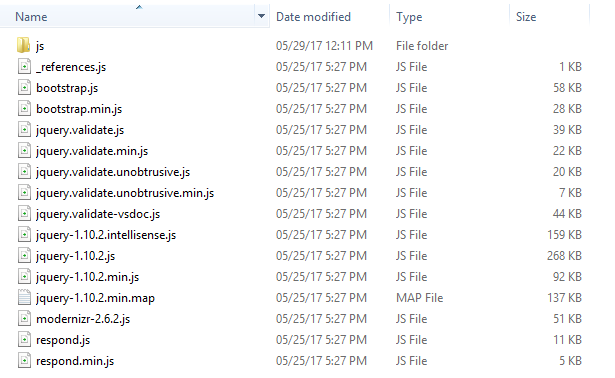
Open “Content”
folder
Step 7:
Go to
telerik installed folder
C:\Program
Files (x86)\Telerik\UI for ASP.NET MVC Q2 2016
Step 8:
Copy
“Styles” folder from “C:\Program Files (x86)\Telerik\UI for ASP.NET MVC Q2 2016”
to “Content” folder of the solution.
Step 9:
Rename the
styles folder into “kendo”
Step 10:
Copy “js”
folder from “C:\Program Files (x86)\Telerik\UI for ASP.NET MVC Q2 2016” to “Scripts”
folder of the solution.
Step 11:
Rename the “js” folder into “kendo”
Rename the “js” folder into “kendo”
Step 12:
Now goto
solution in Visual Studio, expand “Content” and “Scripts ” folder , click on
“Show All Files” button as shown in the below picture.
Step 13:
Now we can
see kendo folder in “Content” and “Scripts” folders.
Step 14:
Right click
on “kendo” folder in both “Content” and “Scripts”, select “Include In Project”
option. See the below figure.
Step 15:
Now both
folders included in Solution.
Step 16:
Now open
“BundleConfig.cs” file in “App_Start” folder.
Step 17:
Add the
below 2 code snippets in BundleConfig.cs file
bundles.Add(new ScriptBundle("~/bundles/kendo").Include(
"~/Scripts/kendo/kendo.all.min.js",
"~/Scripts/kendo/kendo.aspnetmvc.min.js"));
bundles.Add(new StyleBundle("~/Content/kendo/css").Include(
"~/Content/kendo/kendo.common-bootstrap.min.css",
"~/Content/kendo/kendo.bootstrap.min.css"));
Step 18:
After
including the BundleConfig.cs looks like below
Step 19:
Now open “Views/Shared/_Layout.cshtml”
page.
Step 20:
Paste the
below code snippet into head section.
@Styles.Render("~/Content/kendo/css")
@Scripts.Render("~/bundles/jquery")
@Scripts.Render("~/bundles/kendo")
Here we are
including kendo css, scripts to the master page.
Comment @*@Scripts.Render("~/bundles/jquery")*@ in body
section since we have already mentioned in header section.
Step 21:
Now goto “C:\Program
Files (x86)\Telerik\UI for ASP.NET MVC Q2 2016\wrappers\aspnetmvc\Binaries\Mvc5”
folder. Copy the location path
Step 22:
Right click
on “References” in Solution explorer of visual studio
Click on
“Add Reference”
Click on
“Browse” button, paste the copied location path in the previous step
Select
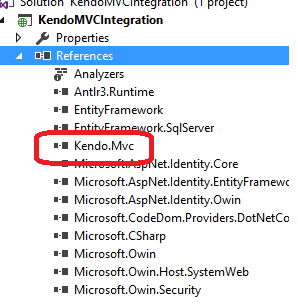
“Kendo.Mvc.dll”, click on “Add” button. Click “Ok” button. Now “Kendo.Mvc” dll reference
will be added.
Step 23:
Now open Views/Web.config
Add below
xml code in namespace section.
“<add
namespace="Kendo.Mvc.UI" />”
Step 24:
Now build
the solution once
Open “Views/Shared/_Layout.cshtml”
page. Type @(Html.kendo(). , intelligence will show up the kendo UI MVC
controls.
Paste the
Calendar control in layout page “@(Html.Kendo().DatePicker().Name("datepicker"))” and
run the application.
We can see
the Kendo Calendar in browser


Comments
Post a Comment